
Apple cider vinegar is a constant staple in my home. If I don’t have a full gallon jug of it in my pantry, that means I haven’t paid attention to how much of it I’m using. I find tons of different uses for it, from making salad dressing to cleaning. I even use it as a throat rinse for when I have a sore throat. Can’t speak to the science behind it, but it really helps relieve sore throat pain for me. Your mileage may vary there.
Apple cider vinegar is a key ingredient in numerous recipes that I make too, like ketchup and home made broth. Given how much I go through it, I recently decided to take a stab at making some of it myself. The results were pretty good, so I figured I’d share them.
How to make apple cider vinegar
Before we get down to making apple cider vinegar, let’s talk safety. It’s vital that everything you use for this recipe is disinfected. That means any jars, bowls, spoons, measuring cups, everything needs to be properly disinfected. Unwanted bacteria can wreck your apple cider vinegar and make it unusable. We don’t want that, right?
Here’s what you’ll need to make apple cider vinegar:
- A quart-sized glass jar
- Apples (scraps and peels work too)
- Sugar
- Filtered water (not tap, not chlorinated)
And here’s how to make it:
Step one: fill your clean glass jar 75% of the way full of chopped up apples. If you’ve made an apple-heavy recipe and have a lot of scraps, this is a great way to use them. You don’t need to buy fresh apples to chop up, scraps work fine.
Step two: stir 1 tablespoon of sugar in with every cup of water used for this recipe. Stir until the sugar has dissolved. Pour water over the apple pieces until they’re fully covered with water. You’ll want to leave at least one inch of empty space at the top of the jar.
Step three: cover the jar, but don’t seal it tight. I used a mason jar for my recipe and used one of the lid rings to seal a piece of an old t-shirt over the top.
Step four: set in a warm, dark location for two weeks. Stir it up about once a day if you remember. Every few days is fine too.
Step five: check for any brown or gray film that forms on top of the vinegar. Skim any of this film off.
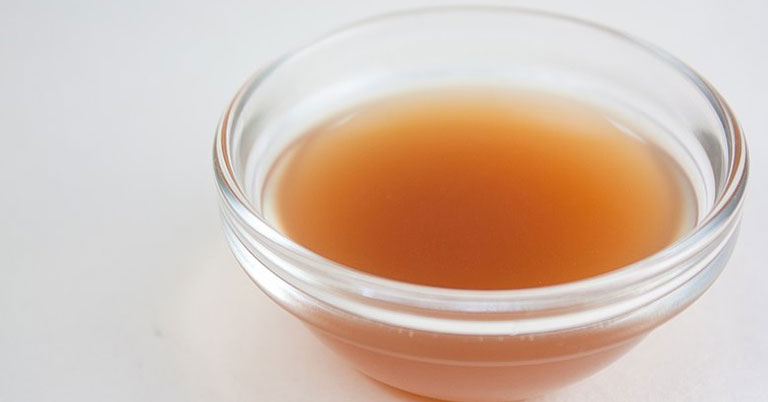
Step six: after two weeks, strain the apple scraps out of the vinegar and discard. These scraps can be composted, fed to chickens or ducks, or simply thrown away. At this point, your apple cider vinegar should smell a bit like vinegar but it won’t have that real sharp vinegar smell to it.
Step seven: your apple cider vinegar will strengthen a bit with time. To make it a bit more pungent, set your strained apple cider vinegar aside again for another two to four weeks. Give it a sniff at the two week mark and again every week after that. Trust me, you’ll know when it’s done.
The verdict
I’m a junkie for DIY stuff, even if it doesn’t make economic sense to make something myself. I get a lot of joy out of making stuff. Apple cider vinegar is definitely one I’ll do again. It was just so easy, and the good, organic, store-bought stuff can get really pricey. 10/10, I recommend!
Keep Reading: How To Make A Beautiful Log Planter