
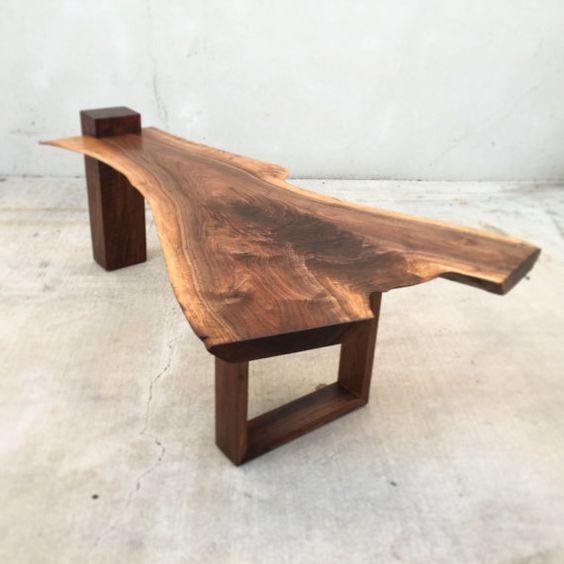
Rustic wood furniture comes with a lot of uniqueness and character, often adding a medieval yet classy touch to any space. This style of décor is influenced by a natural, rugged and unrefined standard of rural living. Also known as live edge furniture, rustic pieces are designed with edges that look raw or mimic the jagged edges of a roughly cut tree. Sometimes, the edges are all smooth but the faces are aged and intentionally left to look rough. Rustic is often used to describe furniture that could stretch from raw farmhouse furniture to manor-style pieces with jagged yet varnished edges.
Emphasizing the natural…
Most times, rustic furniture is made from reclaimed wood, the general term for any piece of wood that has already served a purpose in its previous life. Reclaimed wood is usually the better option over virgin wood for a lot of reasons. Firstly, it’s an eco-friendly option. When you use reclaimed wood, you reduce the demand for fresh wood, thereby reducing deforestation, incineration, and landfill waste. Also, reclaimed wood is often more durable, reportedly 40% stronger than virgin wood on the Janka scale of hardness [1]. Except for insect infestation and wood diseases (which can be treated), reclaimed wood for rustic furniture is the preferred choice.
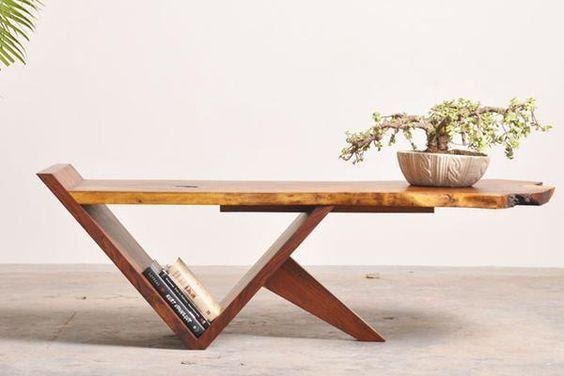
Rustic décor is often an inviting break away from the conventional smooth-edged furniture we’d find almost everywhere around the world. They are often colored to mimic rocky, sandy or dusty terrains. The idea is to leave the wood looking as natural as possible.
Here a few common ways to incorporate rustic furniture into your home or workspace.
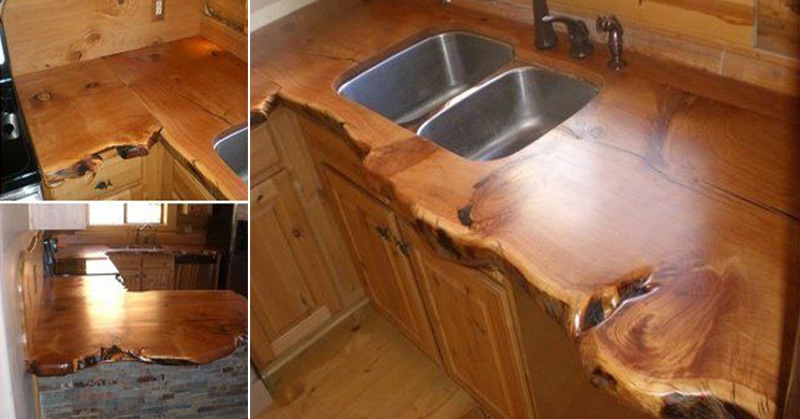
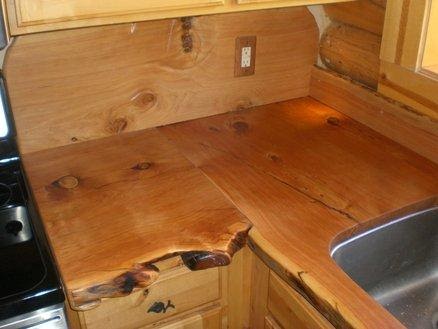
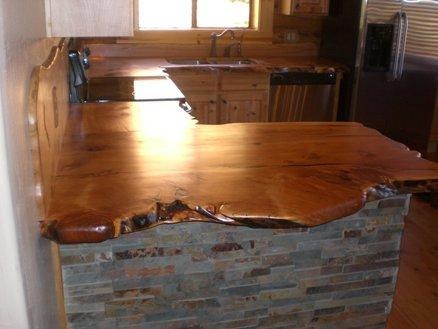
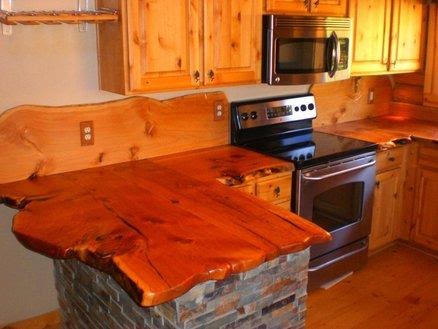
- Kitchen countertops
- Cutting boards
- Writing and computer desks
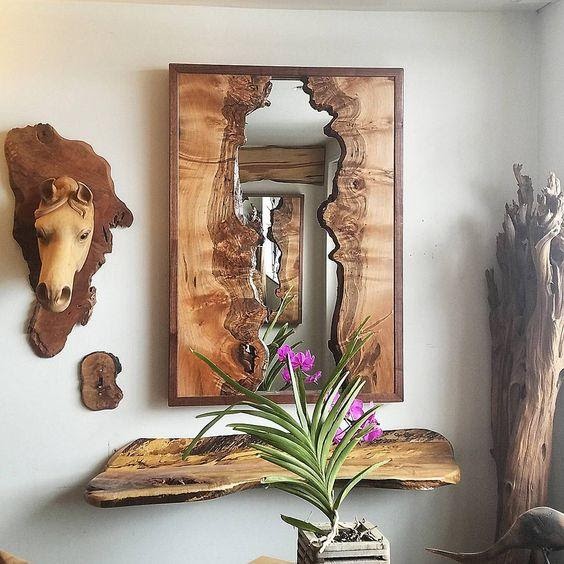
- Wall shelves
- Kitchen Islands
- Bathroom vanity
- Wine rack
- Wardrobes
- Basketball hoop holder
- End-to-end or central lamp holders
- Ceiling beams
- Bed frames
- Benches and seats
With rustic wood, you can get as creative as you want and still be right on track. The opportunities are endless and a lot of the time, they turn out great.
Rustic furniture comes in grades, and as such, they are variably priced. However, even the dodgiest looking pieces of reclaimed wood pieces come at a high price, so there’s no harm in learning a few rustic furniture DIY skills [2].
Materials needed:
- A wooden board of any dimension. For this tutorial, the board was 4 inches thick, 10 inches wide and 6 ft. tall
- 30 or more wooden dowels
- Wood glue (preferably Titebond)
- Dye or stain
- Polyurethane
Tools needed.
- A large, flat working table
- Electric hand saw
- Triple blade power planer and a hand planer
- Jointer (optional)
- Clamps and vices
- Electric chisel
- Hammer
- Belt sander and random orbital sander
- Dowel jig
- Paintbrushes for applying glue
- Pencils for marking
Complete tutorial video:
Step 1: Wood selection and planning
The first step is to select the right wood for your countertop. Check the quality of the piece. Since you’re going to be using it for a lot of activities, some of which would involve high impact, it should have a reasonably high mechanical strength. Any hardwood such as mahogany, teak, cherry, walnut, or oak is perfect. It’s recommended to buy a board with jagged, live edges on one or two sides, although it can still be chiseled to look raw.
You’d have to plane the surface you’re going to work on using a planning machine. If the wood has bows, knots, and twists, you’d have to work gently to straighten them all out to increase the workability.
Step 2: Sawing and replacing
At this point, the wood is still quite heavy to work with, so you’d have to cut it up into smaller pieces, maintaining the rough live edge. For the dimension above, four flatter boards would serve fine. Using a table saw or any kind of safety saw, cut up the wood into for relatively equal parts, starting from the sides, and then from top to bottom.
The pieces would be rough from the sawing process, so you’d have to plane again. At this point, you might want to include the hand planer to finish off smoothly.
Step 3: Joining and assembly
If you have a machine called a jointer, you’re in luck. Jointers are used to make wood pieces perfectly flat for working. However, if you don’t have a jointer, your planer would serve the purpose.
Up next is more planing but you’re getting there. Place all four boards on a straight surface and observe them carefully, marking the spots where the boards aren’t aligning and taking note of any irregularities. You’d most likely have to use your hand planer again to get all four boards perfectly aligned.
Once all the pieces are straight, you’d have to mark out spots in the joints where the dowels go. Dowels are cylindrical pieces of wood, plastic or metal used to join two pieces of larger wood together.
Step 4: Drilling, dowelling and gluing.
To drill holes for the dowels, it’s best to use a dowel jig, a sort of stencil for drilling dowels. This allows you to drill round holes that would fit perfectly into each wood piece. Now, gently begin the drilling process. Once you’ve drilled holes on all the joints, it’s time to glue.
Using a tiny brush, smear some glue on one joint and fit in your dowels all through. Smear glue on the second joint and sit this piece on the first, making sure the jotting dowels fit into the second piece’s holes. You can use a hammer to drive them in.
Repeat this process on all the joints and wait for the glue to dry.
Step 5: Chiseling and sanding
Here’s the fun part. When the glue is completely dry, next up is chiseling the live edge effect onto one side of the board. If your board already has any natural live edges, you may decide to leave it that way and continue with the finishing process.
However, you could use your chisel or any suitable carving tool to make carving, curves, and contours, similar to the jagged surface of a broken branch or a randomly cut stump. Here’s a tutorial:
After that, you’d have to use any sanding equipment (preferably a belt sander) to smooth out any last scratches or roughness. If there are spaces or holes from your previous process, you could fill them up with an epoxy resin.
Step 6: Finishing
Now for the finishing, this would part is totally up to your taste. There are tons of colors of dyes and stains, so it all depends on what you want for your décor. Contrary to what a lot of people think, rustic actually looks pretty cool with non-earthy colors.
Now, you’d have to test the dye or stain out on a splinter of the wood before you coat the entire surface. You may want to dilute the solution further, such as adding more mineral spirits to the oil-based stain or more water to the dye solution to control the color.
Basically, dye and stain serve the same purpose. However, the stain does not only add color to the wood, but it adds a protective layer over it. Dye penetrates the wood and while the color will last longer, it offers no protection.
For whichever one you go for, it’s best to try it out on a splinter before coating. Finally, use a brush to smear a polyurethane solution onto the top, bottom, and sides to seal everything in. Focus on the live edges to give them the best protection.
Here are some lovely rustic edge ideas [3]:

- Jamie Peebles. 5 REASONS TO CHOOSE RECLAIMED WOOD FLOORING. Northern Wide Plank. https://northernwideplank.com/blogs/learn/5-reasons-to-choose-reclaimed-wood-flooring. Retrieved 07-03-2020
- Nancy. How To Make A DIY Wood Countertop (easier than you thought!) Artsy Chicks Rule. https://www.artsychicksrule.com/how-to-make-a-diy-wood-countertop/. Retrieved 07-03-2020
- Rustic Countertop For Cabins. Good Home Design. https://www.goodshomedesign.com/rustic-countertop-for-cabins/. Retrieved 07-03-2020
- Admin. What Is Reclaimed Wood? The New and Reclaimed Flooring. https://www.reclaimedflooringco.com/what-is-reclaimed-wood/. Retrieved 07-03-2020