
There’s nothing quite like a summer evening. With the heat of the sun gone, it’s a beautiful time to sit out and relax. What makes this even better? A DIY fire pit! Not only can the smoke help to keep mosquitoes away (especially depending on what you burn), but they provide a warmth that lets you sit out even when the weather turns a bit cooler.
Thankfully, learning how to build your own fire pit is much easier than you might think!
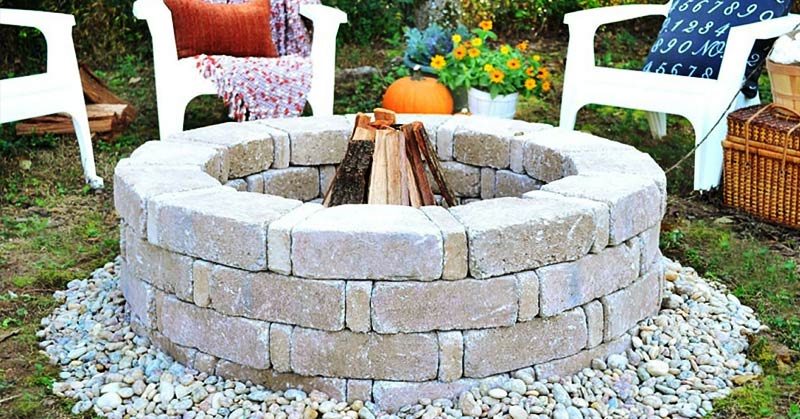
How To Build a Fire Pit
Building your own backyard fire pit is so easy, you can start it this afternoon and be enjoying a crackling fire by the evening. Follow these steps to have yours ready in no-time. (1)
- Collect your materials.
To build your fire pit, you will need:- (48) 25.5cm x 18cm tumbled concrete wall blocks
- (48) 7.5cm x 18cm tumbled concrete wall blocks
- 6 bags of river rock
- A rake
- A garden hoe
- Shovel
- 3 ’- 4’ level
- Weedkiller (optional)
- Build your foundation
Pick where you want your fire pit to go. Then, create your first circle layer by alternating the larger bricks with the smaller ones. Using the leveler, make sure that the circle is no more than an inch or two uneven all the way around. If needed, dig some of the dirt out from underneath taller blocks so that everything is level. If your base isn’t even, the whole pit will tumble over. - Build your sides
Continue the small-brick-large-brick alternating pattern, but make sure you are stacking the bricks so that small ones are on top of big ones and vice-versa. As you build your walls, make sure to check each time that it is level and even. - Clear the perimeter
With the shovel and hoe, clear out at least a two-inch space around the fire pit. If you wish, you can apply weedkiller to prevent weeds from growing up the walls and into your pit. - Put down the river rock
Spread the river rock around the cleared area so that it covers it entirely. This is an important step as the river rock will help to keep the base of your fire pit in place. Put more river rock on the inside of the fire pit as well. This will also help to keep the base from shifting, as well as assist with drainage and minimize weed growth.
Now that your fire pit is built, now all that’s left to do is set some chairs up around it and enjoy! As always, be sure to read up on fire safety codes in your area to ensure that your fire pit is an appropriate size and height, and that it is far enough away from any buildings or structures.
Read: 16 Fun and Fancy Ways to Use Cinder Blocks Around Your Home and Garden
Please also practice fire safety:
- Never leave a fire unattended.
- Never leave children or pets alone near the fire.
- Do not put any potential explosive materials into the fire pit.
- Do not burn plastics or anything that will release toxic chemicals into the air when burned.
- Be mindful of alcohol consumption around fires so as not to impair yourself or put yourself in harms way.
More of a visual learner? Check out this similar but different tutorial below:
Enjoy your evenings by the fire!
Keep Reading: How to Build Your Own Backyard Bowling Alley